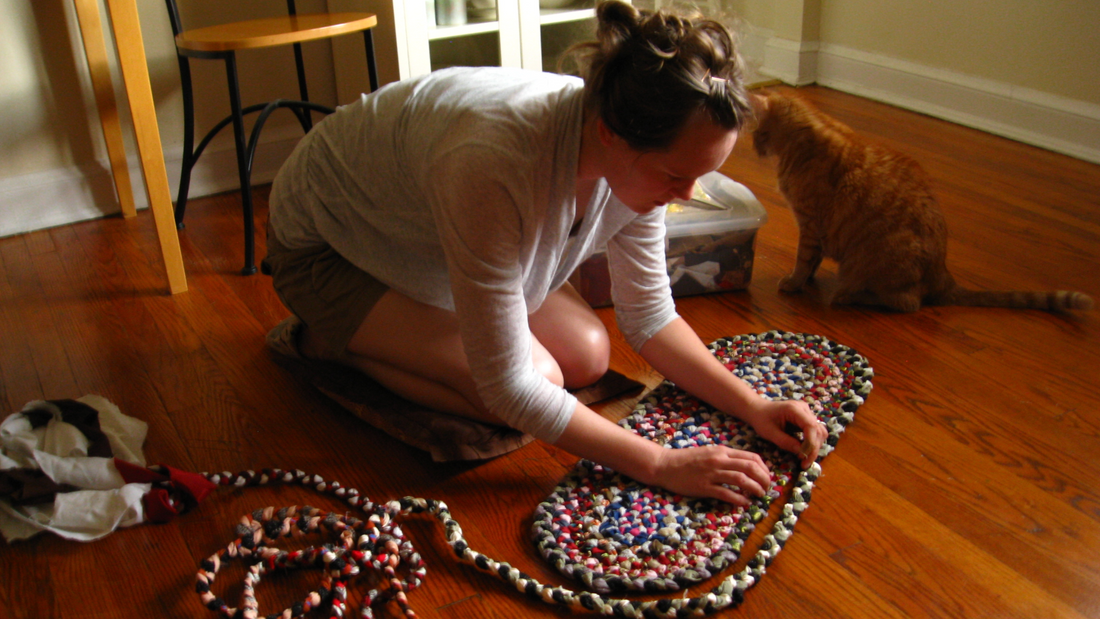
How to Make Braided Rugs at Home
Share
Crafting Charm with Hands
Ever thought about crafting your own decor? There's something magical about creating a beautiful object with your own hands, especially when it’s a braided rug.
Why Choose Braided Rugs?
You might be wondering, "Why braided rugs?" Let's dive into the past and present to understand better.
History of Braided Rugs
Rooted in early American history, braided rugs were born out of necessity. Made from scraps of worn-out clothing, these rugs have a heritage of sustainability and charm.
Benefits and Beauty
Apart from their historical significance, braided rugs offer durability, warmth, and a cozy aesthetic touch to any room.
Materials Needed for a DIY Braided Rug
Ready to begin? Gather your supplies and let’s create something special.
Fabric Selection
Consider upcycling old clothes or purchasing fabric that resonates with your color preferences.
Essential Tools
Scissors, a needle, strong thread, and perhaps a friend for some braiding fun!
Preparing the Fabric Strips
The first step is to get your fabric ready.
Cutting the Fabric
Cut your chosen fabric into strips. The wider the strips, the chunkier the braid will be. How's that for customization?
Stitching Strips Together
Join the fabric strips end to end, ensuring you have a long continuous strip ready for braiding.
Braiding the Rug
With your fabric strips in hand, it's braiding time!
Starting the Braid
Start with three fabric strips. Just like braiding hair, you'll intertwine the strips, ensuring each segment is firm yet flexible.
Maintaining Consistency and Tension
A consistent tension ensures a flat, beautiful rug. Remember, too tight and it’ll curl, too loose and it’ll sag. Finding the sweet spot? That's the art!
Forming and Finishing the Rug
Once you've got enough braid, it’s time to turn it into a rug.
Shaping Your Braided Rug
Starting from the center, coil the braid, sewing it together as you go along. Circular, oval, or even heart-shaped? Let your creativity shine!
Sewing and Securing
Using a needle and thread, sew the braids together, ensuring the rug holds its shape and remains durable.
Tips and Troubleshooting
Crafting, like life, is full of surprises. Here’s how to tackle them.
Handling Uneven Braids
If your braid is uneven, don't fret. Adjust the tension and ensure your fabric strips are of consistent width.
Caring for Your Handmade Rug
Love and care extend the life of your creation. Gentle vacuuming and occasional hand-washing will keep it looking fresh.
Conclusion: The Satisfaction of Handmade Decor
In a world of mass-produced items, a handmade braided rug stands out. It's not just decor; it’s a testament to your creativity, effort, and love.
FAQs:
-
Can I mix different fabrics for my braided rug?
- Absolutely! Mixing fabrics can give a unique texture and look.
-
How long does it take to make a DIY braided rug?
- Depending on the size, it can take anywhere from a few hours to a weekend.
-
How do I prevent my braided rug from slipping?
- Consider using a non-slip rug pad beneath it.
-
Can I make a multicolored braided rug?
- Yes, and it's encouraged! Play with colors for a vibrant and fun rug.
-
How do I clean my handmade rug without causing damage?
- Hand wash using mild detergent and let it air dry.
By making your own braided rug, you’re not just crafting decor, you're weaving memories. Enjoy the process and the product!
